
How to Build a Tote Rack
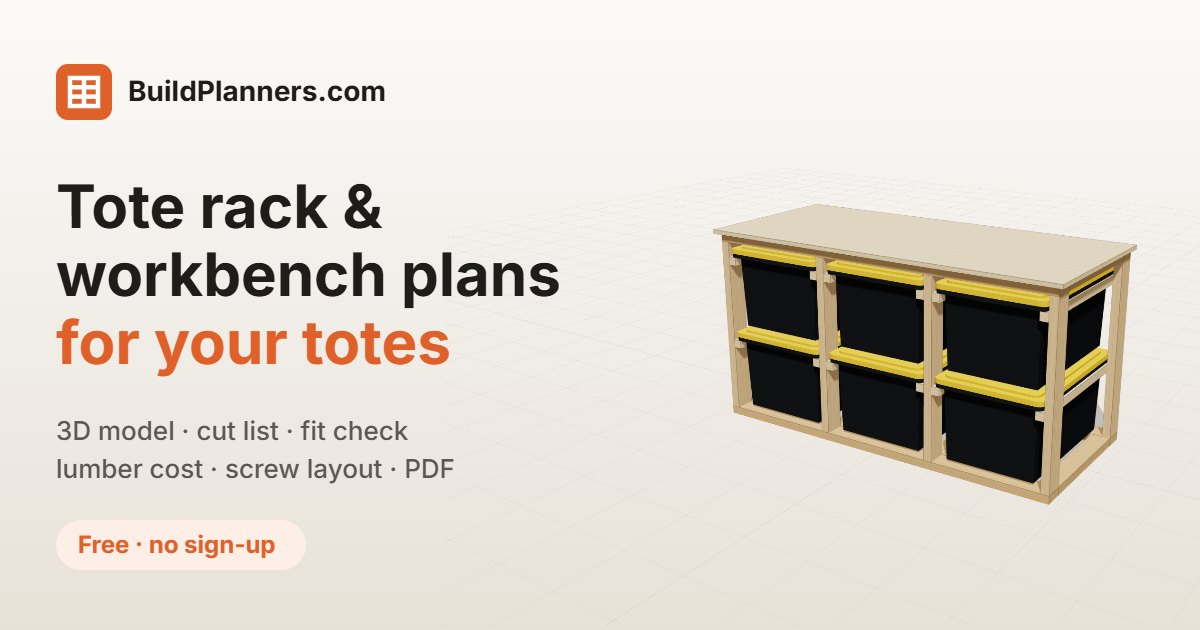
A good tote rack is just a 2x4 frame with a pair of runners for every tote to hang from. The trick is sizing it to the totes you really own, so they slide in and out without catching. Here is how the build goes, with a real cut list and cost for a six-tote rack.
Open the free planner Free · no sign-up · opens with a 3 × 2 rack (change the size once it opens)
What you'll need
Materials
- Eight 2x4 boards, 8 ft long (posts, rails and cross members)
- Four 2x2 boards, 8 ft long (the runners the totes hang from)
- One sheet of 3/4″ plywood, 4×8 ft (the bench top)
- Construction screws in 3 1/2″, 2 1/2″ and 2″ lengths
- Wood glue
- Optional: four locking casters if you want it to roll
Tools
- Miter saw or circular saw
- Drill/driver with a countersink bit
- Tape measure and speed square
- Clamps
- Sandpaper
That list is for the default 3 × 2 rack that holds six HDX 27-gallon totes. A different tote, more columns or a taller stack changes the quantities, which is what the planner works out for you.
Step-by-step overview
- Measure one tote. Check the tote’s width, length and height, and how far its lip sticks out. The lip is what rests on the runners, so it matters more than the body. The planner has presets for HDX, Sterilite and IKEA totes, or you can type your own numbers.
- Pick columns and rows. Decide how many totes wide and tall. In the example that is 3 columns by 2 rows. The planner adds a little clearance for the sides and top of each tote and shows the overall size so you can check it against your space.
- Cut every part from the cut list. Cut posts, runners, rails and cross members to length and label them. Square cuts on the rails and cross members matter most, because they keep the frame from racking.
- Build the base frame. Join two long 2x4 rails and the cross members into a rectangle, with a cross member under each divider. Measure both diagonals; if they match, it is square.
- Mark and attach the runners. Gang the posts together and mark the top of each runner from the bottom, so every tote sits at the same height. Screw the runners on, tying each front and back post into a divider. End dividers get runners on the inside only; middle dividers get them on both faces.
- Stand the dividers on the base. Use a spacer block cut to the tote bay width at the top and bottom of each bay so the dividers stay parallel, then fasten them to the base.
- Add the top frame and bench top. Build a matching top frame, fasten it over the dividers, and screw the plywood top on from underneath with the overhang shown in the plan.
- Test-fit every tote. Slide a tote into each bay. Sand any runner edge that catches, then add casters or a back panel if you planned them.
Example cut list and cost
This is exactly what the planner produces with its default settings: a 3 × 2 rolling-workbench rack for HDX 27-gallon totes. It comes out 69 1/2″ wide, 30″ deep and 36 1/2″ tall, holds six totes, and gives you a plywood work surface on top.
Cut list
| Part | Material | Qty | Length |
|---|---|---|---|
| Post | 2x4 | 8 | 32 3/4″ |
| Runner | 2x2 | 12 | 29″ |
| Base rail (front/back) | 2x4 | 2 | 67 1/2″ |
| Base cross member | 2x4 | 4 | 22″ |
| Top rail (front/back) | 2x4 | 2 | 67 1/2″ |
| Top cross member | 2x4 | 4 | 22″ |
| Bench top | 3/4″ plywood | 1 | 69 1/2″ × 30″ |
That is 33 pieces in all. The planner packs them onto 12 boards and one plywood sheet, allowing for the saw kerf.
Shopping list and cost
| Item | Qty | Cost |
|---|---|---|
| 2x4 × 8 ft | 8 | $31.84 |
| 2x2 × 8 ft | 4 | $15.92 |
| Plywood 3/4″ 4×8 sheet | 1 | $54.98 |
| Screws 3 1/2″ (1 lb box ≈ 55) | 2 | $23.96 |
| Screws 2 1/2″ (1 lb box ≈ 95) | 1 | $11.98 |
| Screws 2″ (1 lb box ≈ 135) | 1 | $11.98 |
| Wood glue | 1 | $5.98 |
| Estimated total (before tax) | $156.64 | |
Lumber is $150.66 of that, or about $26 per tote slot. Prices are the planner’s typical big-box defaults and change by region and season; you can edit any price in the planner and it remembers your changes.
Tips and common mistakes
- Measure the lip, not just the tote. A tote that is the right width but has a short lip will slide off narrow runners. Aim for at least 3/8″ of lip resting on each runner.
- Leave a little air. Totes are never perfectly straight, so give each one about 1/8″ of space between the tote wall and the runner face. The planner builds this in.
- Check for square before you screw. Equal diagonals on the base and top frames save you from a rack that leans.
- Buy the exact tote first. Brands change shape between runs. If you are working from a tape-measured tote, use the planner’s custom measurement option.
- Add casters only if you need them. Casters raise the whole rack, so check the overall height against your ceiling and garage door. Locking casters are safer.
- Anchor tall racks. If you stack more than two or three rows, screw the rack to a wall stud so it cannot tip when a drawer-height tote is pulled out.
Frequently asked questions
How much does it cost to build a tote rack?
The default 3 × 2 rack in the planner costs about $157 in typical big-box prices, or roughly $26 per tote slot. A bigger rack costs more in total, but each slot gets cheaper because the frame is shared.
What size lumber should I use?
Standard 2x4s for the posts and rails and 2x2s for the runners work for most plastic totes. The planner also supports other lumber sizes, and a plywood-panel style if you prefer solid sides.
Will it fit totes other than HDX?
Yes. Pick a Sterilite or IKEA preset, or enter your own tote’s width, length, height and lip size. The cut list updates to match.
How many totes can one rack hold, and how much weight?
You choose the columns and rows, up to 12 wide and 10 tall. Weight depends on what is in the totes and on how well the runners are fastened, so spread heavy loads across the lower rows and keep the bottom rail well screwed.
Can I make it roll?
Yes. Turn on casters in the planner and it adds the caster height to the overall size. Four locking casters rated for the full loaded weight is a good rule.