
DIY Greenhouse Plans
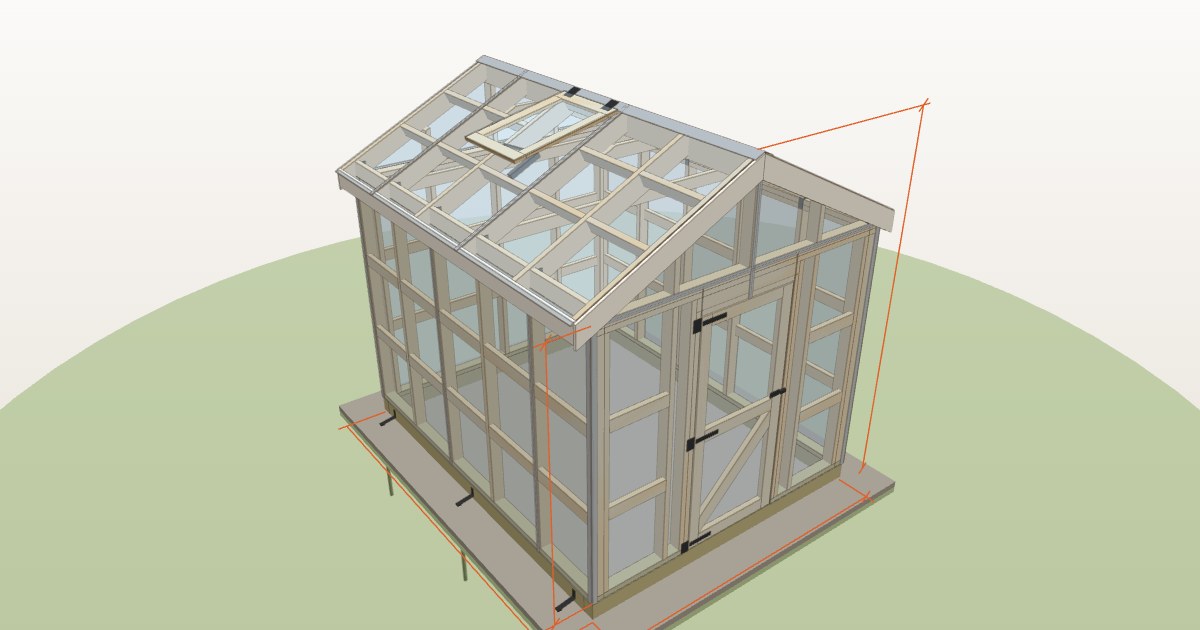
A wood-framed greenhouse is a small shed skinned in twinwall polycarbonate instead of siding, and most of the cost is the glazing. This guide walks through the build and shows the real cut list, panel count and cost for an 8 × 10 ft gable greenhouse on a timber base.
Open the free planner Free · no sign-up · opens with an 8 × 10 ft gable greenhouse (change it once it opens)
What you'll need
Materials
- Pressure-treated 4x6 timbers for the base, and treated 2x4 bottom plates
- 2x4 studs, plates, girts and purlins, 2x6 rafters and a 2x8 ridge board
- 8 mm clear twinwall polycarbonate panels, 4 ft wide (16 for the example)
- H-profiles for the panel joints, U-profiles to cap the panel ends, a ridge cap and corner profiles
- Foil tape for the top ends of the panels, anti-dust vent tape for the bottom ends, and clear silicone
- Polycarbonate screws with EPDM washers
- An automatic wax vent opener, hinges and weatherstrip for each roof vent
- Gravel, landscape fabric, rebar stakes and ground anchors
Tools
- Circular saw and a miter saw
- Fine-tooth blade or utility knife for the polycarbonate
- Drill/driver and a framing hammer or nailer
- Framing square, speed square and a 4 ft level
- String line, tape measure and chalk line
- Plate compactor (rent one)
These are the materials for the 8 × 10 ft gable greenhouse with one roof vent priced below. A lean-to, a single-slope roof, a knee wall, benches or thicker panels change the quantities, and the planner recounts every stud, panel and profile.
Types of styles
The roof shape decides where the greenhouse can go and how much headroom it has. The planner builds three, and you can add a knee wall, benches and extra vents to any of them.
- Gable. A freestanding greenhouse with two roof slopes and the most headroom down the middle. It is the default, at 8 × 10 ft.
- Lean-to against a wall. One slope that leans on a house or garage wall, hung from a ledger lagged into the wall. It is cheaper, and the wall holds heat.
- Single-slope. A freestanding greenhouse with one roof slope. Face the low side south so the roof tilts toward the winter sun.
- Knee wall and benches. An 18–36″ wall of cedar boards or SmartSide below the glazing, with slatted cedar benches at or above it.
- Glazing thickness. 6, 8 or 10 mm twinwall polycarbonate. Thicker panels insulate better and need fewer purlins.
Start from an example
Pick an example and the planner opens with it already loaded. You can change every size and option from there.
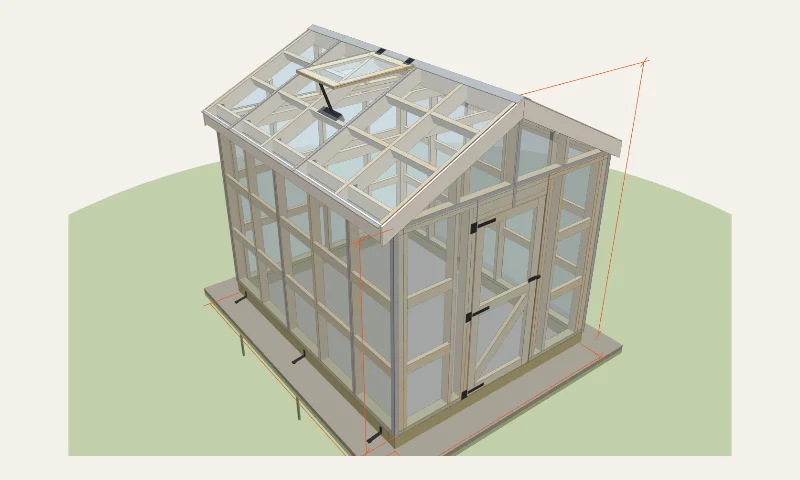
8×10 gable greenhouse example
The default: a freestanding gable with one automatic roof vent and a glazed door.
- 8′ × 10′, 9′ 9″ peak
- 16 twinwall panels, 26% vent area
- Est. $2,951.31 ($36.89/sq ft)
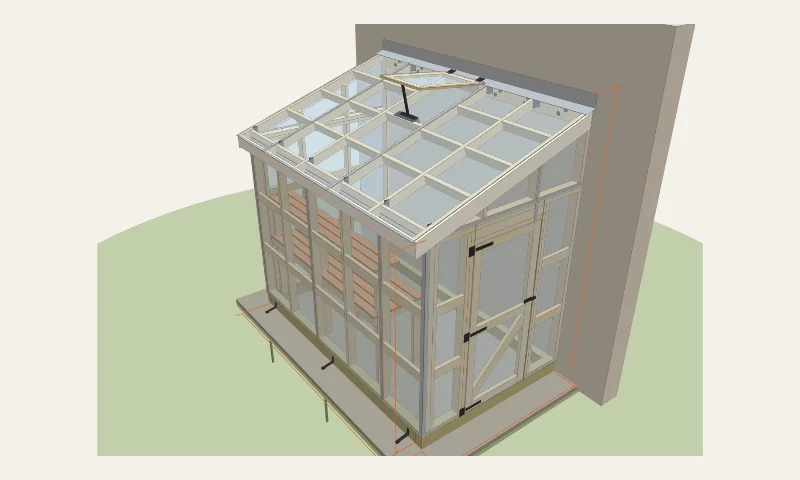
6×10 lean-to against a wall example
A lean-to on a house or garage wall with a 4/12 roof and a slatted bench.
- 6′ × 10′, 9′ 11 3/4″ at the wall
- 10 twinwall panels, 34% vent area
- Est. $2,313.33 ($38.56/sq ft)
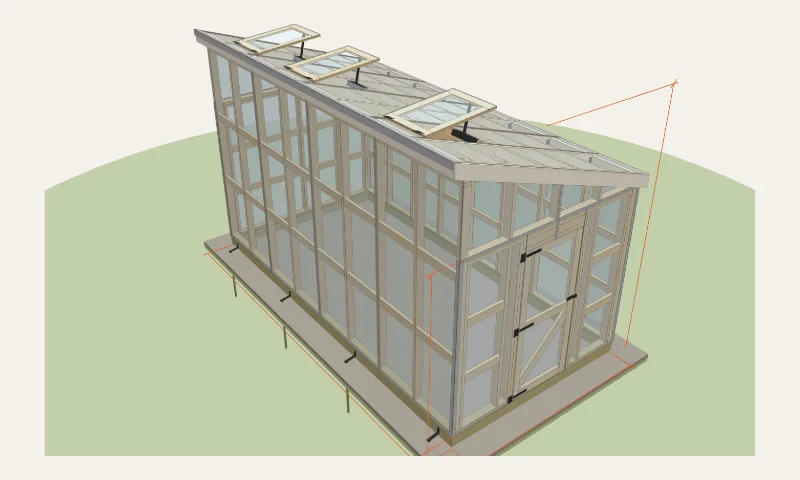
8×16 single-slope with roof vents example
A long single-slope greenhouse with three automatic roof vents.
- 8′ × 16′, 10′ 7 1/2″ peak
- 17 twinwall panels, 3 roof vents
- Est. $4,018.65 ($31.40/sq ft)
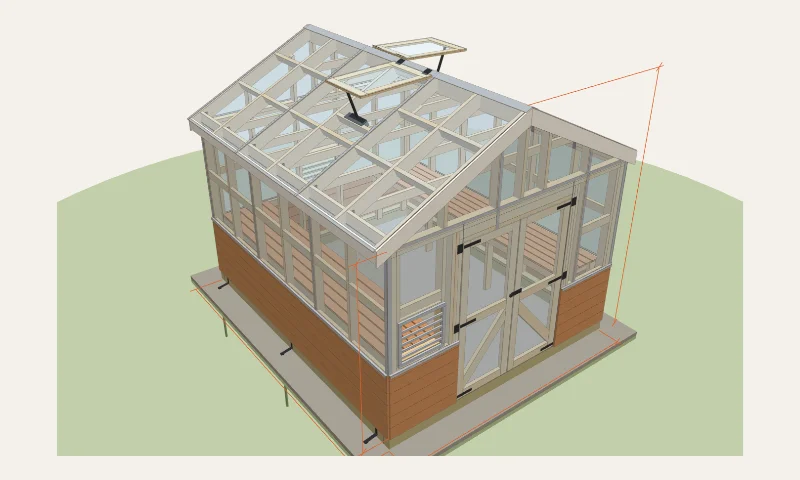
10×12 greenhouse with knee wall and benches example
A gable with a 30″ cedar knee wall, louvered intakes and slatted cedar benches.
- 10′ × 12′, 10′ 3″ peak
- 2 roof vents, 2 louvers, 33% vent area
- Est. $4,604.07 ($38.37/sq ft)
Step-by-step overview
- Pick the spot and check the rules. Choose a level, well-drained spot with full sun, ideally with a long side facing south. Check setbacks and permits with your town, and call 811 before you dig.
- Build the gravel pad and timber base. Strip the sod, lay landscape fabric and compact 4″ of gravel, which also becomes the floor. Set the 4x6 treated timbers on edge, square and level, screw the corners and pin them with rebar stakes.
- Frame the walls at 24″ on centre. Build each wall flat and stand it up. Studs sit 24″ apart so every edge of a 4 ft panel lands on wood, and horizontal girts between the studs carry the panels across their flutes.
- Raise the rafters and fit the purlins. Set the ridge and rafters 24″ apart, tie each rafter to the plate, then nail purlins between the rafters. Purlin spacing depends on the panel thickness and your snow load; the planner spaces them for you.
- Frame the vents and door. Frame each roof vent opening near the ridge, where the hot air collects, and frame the door opening with a header.
- Glaze the walls. Tape the top end of each panel with foil tape and the bottom end with vent tape, then cap both with U-profile. Stand the panels with the flutes vertical, join them with H-profiles and screw every 14″ through oversized holes so the plastic can expand.
- Glaze the roof. Lay the roof panels with the flutes running down the slope, joints on the rafters, and finish with the ridge cap. Leave the vent openings clear.
- Fit the door, vents and anchors. Hang the glazed door, build the vent lids and fit the automatic openers. Seal the corners and the ridge-cap ends, then screw ground anchors in at the corners and along the sides: greenhouses are light and catch the wind.
Example cut list and cost
This is the planner’s default greenhouse: 8 × 10 ft, 6′ 8″ walls, a 6/12 gable roof and 9′ 9″ at the peak, framed in 2x4 at 24″ with 2x6 rafters, glazed with sixteen 8 mm twinwall panels, on a 4x6 timber base over gravel. It has one automatic roof vent, and with the door open the vents equal 26% of the floor area. The table shows the main framing.
Cut list
| Part | Material | Qty | Length |
|---|---|---|---|
| Base timber | 4×6 PT | 2 | 8′ 0″ |
| Base timber | 4×6 PT | 2 | 9′ 5″ |
| Bottom plate (side walls) | 2×4 PT | 2 | 10′ 0″ |
| Top plate (side walls) | 2×4 | 2 | 10′ 0″ |
| Second top plate (side walls) | 2×4 | 2 | 9′ 5″ |
| Bottom plate (front and back) | 2×4 PT | 2 | 7′ 5″ |
| Top plate (front and back) | 2×4 | 2 | 7′ 5″ |
| Second top plate (front and back) | 2×4 | 2 | 8′ 0″ |
| Stud | 2×4 | 21 | 6′ 3 1/2″ |
| King stud | 2×4 | 2 | 6′ 3 1/2″ |
| Jack stud | 2×4 | 2 | 6′ 0″ |
| Girt | 2×4 | 32 | 18 1/4″ to 22 1/2″ |
| Rafter | 2×6 | 12 | 5′ 0″ |
| Ridge board | 2×8 | 1 | 10′ 0″ |
| Purlin | 2×4 | 18 | 21 3/4″ to 22 1/2″ |
| Collar tie | 2×4 | 2 | 2′ 1 1/4″ |
| Rafter tie | 2×4 | 2 | 8′ 0″ |
The girts and purlins are short blocks in a few lengths, combined here. The planner also lists the header, gable studs, eave blocking, fascia, rake boards, the vent frame and the door, and it draws a cutting diagram for every panel.
Shopping list and cost
| Item | Qty | Cost |
|---|---|---|
| Framing lumber and trim (treated base and plates, 2×4, 2×6, 2×8, 1×4, 1×6) | 80 boards | $544.42 |
| 8 mm clear twinwall panels (15 × 4×8 ft, 1 × 4×6 ft) | 16 | $1,102.68 |
| H-profiles and U-profiles, 12 ft | 18 | $339.64 |
| Anti-dust vent tape and aluminium foil tape | 4 | $57.92 |
| Polycarbonate screws with EPDM washers, 100-packs | 6 | $149.88 |
| Ridge cap and corner profiles | 5 | $97.90 |
| Clear silicone sealant | 3 | $26.94 |
| Roof vent: automatic wax opener, hinges and weatherstrip | 3 items | $58.94 |
| Gravel, landscape fabric, rebar stakes and 6″ structural screws | 4 items | $192.93 |
| Door latch and T-hinges | 4 | $36.92 |
| Nails, hurricane ties, connector nails and 8 ground anchors | 5 items | $263.18 |
| Exterior stain or paint for the frame | 2 gal | $79.96 |
| Estimated total (before tax) | $2,951.31 | |
Glazing (panels, profiles, tapes, screws and sealant) is $1,774.96 of that, three times the lumber at $544.42. The whole greenhouse comes to about $37 per square foot of floor. The planner shows each of these as its own priced line with Buy links, and you can edit any price. The total is before tax and delivery.
Tips and common mistakes
- Keep the flutes vertical. Wall panels stand with the flutes up and down, and roof panels run with the flutes down the slope, so condensation drains out instead of collecting.
- Tape and cap both ends. Solid foil tape at the top and breathable vent tape at the bottom keep dust, bugs and algae out of the channels. Then cap them with U-profile.
- Drill oversize holes. Polycarbonate grows and shrinks with temperature. Drill each hole 1/8″ larger than the screw and don’t overtighten the EPDM washers.
- Ventilate more than you think. Aim for vents that open at least 15–20% of the floor area. Roof vents near the ridge with automatic wax openers do this without power; add louvers low down or a fan for hot climates.
- Face it south. For the most winter light, point a long side south. A lean-to works best on a south-, east- or west-facing wall, which also holds the day’s heat.
- Anchor it. A greenhouse is light and catches the wind like a sail. Use ground anchors at every corner and along the long sides, and more in exposed spots.
Frequently asked questions
How much does it cost to build a greenhouse?
The 8 × 10 ft wood-framed gable greenhouse in the planner costs about $2,951 in materials, or about $37 per square foot of floor. A 10 × 12 ft gable comes to about $3,980, and a 6 × 10 ft lean-to against a wall to about $2,313. Glazing is the biggest part of the cost.
What thickness of polycarbonate should I use?
Eight millimetre twinwall is a good all-round choice and the planner’s default. Six millimetre is cheaper and fine for mild climates, while 10 mm insulates better and spans farther between supports. The planner also offers 6 and 10 mm and spaces the girts and purlins for the thickness you pick.
How far apart should greenhouse studs and rafters be?
Twenty-four inches on centre, so every edge of a 4 ft wide panel lands on a stud or rafter. Between them, girts and purlins support the panels across the flutes; their spacing comes from a snow-load guideline for each panel thickness. Check the panel maker’s own table too.
How much ventilation does a greenhouse need?
A common rule is vent openings of at least 15–20% of the floor area. The planner adds up the roof vents, louvers and door and tells you if you fall short, and it can size an exhaust fan for about one air change per minute.
What foundation does a greenhouse need?
The default is a treated timber base on compacted gravel, pinned with rebar and held down with ground anchors. The planner also supports blocks, piers, a wood floor or a concrete slab, and links to the Concrete Pad Planner for the slab.
Can I add a knee wall or benches?
Yes. The planner can add an 18–36″ knee wall in cedar boards or SmartSide below the glazing, and slatted cedar benches with a check that the aisle stays at least 24″ wide.